Welcome to the second part of our series on responding to macOS attacks. In the previous part, that you can read here, we discussed the setup of our test environment, structure of this series and we kicked off with some Initial Access & Execution tactics for MacOS.
If you want to read other parts of this series take a look at the table that will be updated as the series progresses.
Introduction
In this post we will focus on the Persistence & Privilege escalation techniques specific to MacOS environments. A quick shout-out to this awesome SentinelOne blog on malware persistence. We will pick up where we left off, after the threat actor gained initial access and/or malicious code was executed. For a full overview of the techniques that are covered in this series, please go to our GitHub page which contains mindmaps and MITRE ATT&CK Navigator layers.
Persistence
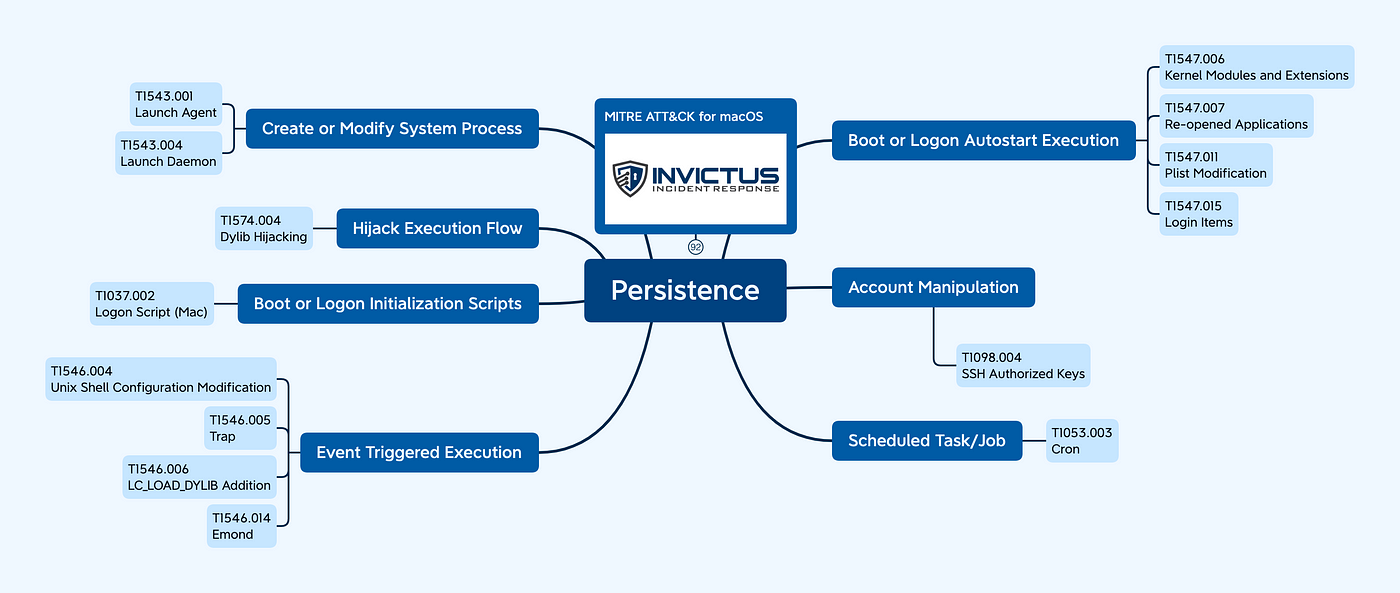
The Persistence phase is where a threat actor tries to maintain access to a system in order to survive reboots, disconnects or maybe even changed credentials. As shown in the picture below, there’s a range of methods and techniques a threat actor can employ to achieve persistence.
Create or Modify System Process
Let’s dive straight in with arguably one of the most popular methods used by threat actors to achieve persistence. A threat actor can create a system process that automatically starts when the system is booted. An added benefit of this method is that system processes often are launched with ‘Administrator’ like privileges. And be honest, do you know what processes are started automatically when you boot your Mac? In macOS there are two ways of creating a system process:
- Launch Agent
- Launch Daemon
The difference is that a Launch Agent is executed in context of a user and a Launch Daemon on a system level. Therefore, the permissions for creating and/or modifying a Launch Agent/Daemon differ. Both the Launch Agent and the Launch Daemon are controlled through so-called plists(Property List) official documentation can be found here. So now that we know the differences between both techniques let’s study them in a bit more detail.
Launch Agent — T1543.001/Launch Daemon — T1543.004
Since the working of a Launch Agent and Launch Daemon is very similar we have combined them in this section.
A Launch Agent/Daemon is started when a user logs in. The configuration is stored as plists in one of the following locations.

The first two locations contain Launch Agents/Daemons supplied by Apple as part of the operating system. Meaning that there are a lots of them in this directory, but the good news is most are not executed when the system is booted. To investigate what Agents/Daemons are started upon boot, you need to inspect the plist files. Plist files are XML formatted files and to determine if a Agent/Daemon will be automatically started you need to watch for the RunAtLoad key in the .plist files. Let’s look at an example, you can just open a plist with your favourite editor in terminal or TextEdit on a Mac.

As you can see the <key>RunAtLoad</key> is set to true, meaning that this Launch Agent will be started when this user logs in.
Manual start
As you’ve seen in the example above it’s possible to create Agents/Daemons that run at boot time. However, it’s also possible to manually start one, to do that you can use the launchctl command.
Launchtl, interfaces with launchd to load, unload daemons/agents and generally control launchd. launchctl supports taking subcommands on the command line, interactively or even redirected from standard input.
Source: Manual page
In plain English, you can use launchtl to run another utility called launchd, which in turn is used to interact with Agents/Daemons. From an incident response perspective we will focus on analysing what is currently running on a system or what has been executed on a system. Some useful commands are shown below:
$ launchctl list
Make sure you also run it with administrative privileges
$ sudo launchctl list
Output of the above command will show you all loaded Launch Agents/Daemons.

Running vs non-running
If the PID field contains a PID it’s running. If you see a ‘-’ it means it’s currently not running, but only loaded.
Sudo vs non-sudo
If you run the command with sudo privileges you only get Daemons loaded by root. Make sure you run both commands to get the full picture. In the below example you’ll see the difference in output for both sudo and non-sudo output by grabbing the first 5 lines.

Status
The status flag shows the exit code for the process this will always be a numeric value. If it’s a negative such as ‘-78’ the 78 stands for the PID that killed the job.
Label
The label contains the name of the Launch Agent/Daemon, we can use this to grab specific information about the daemon.
Investigating a suspicious daemon
To investigate and to assess if we’re dealing with a suspicious daemon we want to know more than just the PID/Status/Name. Ideally we want to know what’s in the plist for the daemon and where it’s stored. To get additional information you’ll need some additional commands as well:
$ launchctl <Label>
This command provides us with information on the specified service see example output below:

In the above screenshot you can see additional information for the com.apple.progressd Daemon. We can go a step further using another command.
$ launchctl dumpstate |grep -B1 -A4 <Label>
The dumpstate provides additional details such as the plist that contains the configuration details for the Daemon as shown below:
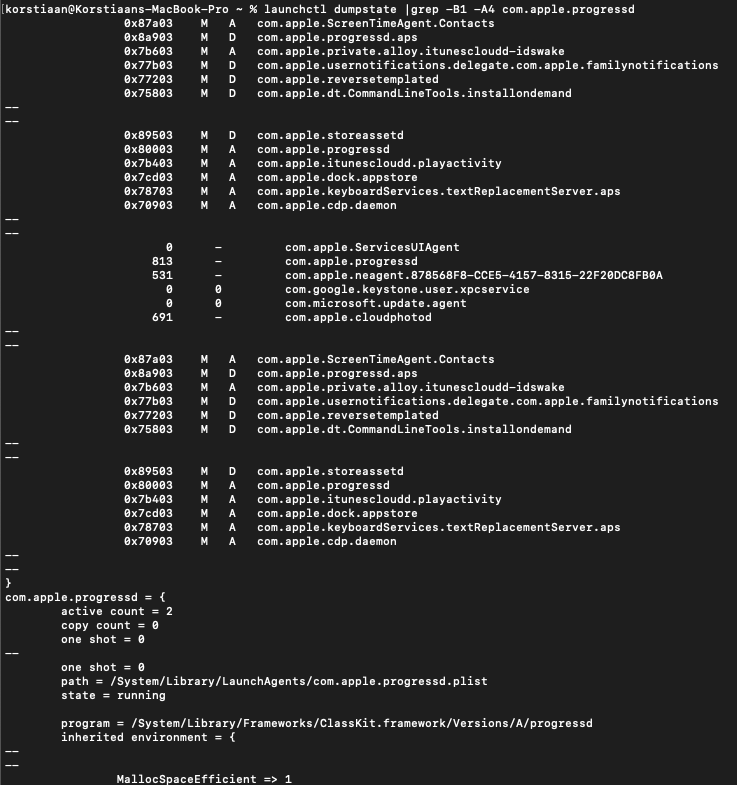
In the above example we can see that the path variable contains the path towards the plist for this particular Daemon. An alternative is the print command:
$ launchctl print system|user <Label>
When you use the print command, you need to know the execution context of the Daemon which isn’t that difficult, but it’s something to consider.
Launch Agents/Daemons, key takeaways for incident responders:
- Shapes and sizes, as you’ve undoubtedly seen, Launch Agents & Daemons come in different forms and sizes, make sure you check all locations and with correct permissions;
- Create a baseline of Agents/Daemons if you’re responsible for security in an enterprise environment;
- Check out KnockKnock by Objective-See to find hidden persistence methods.
Hijack Execution Flow
This category of techniques is very known in the Windows world, just look at all the different DLL attacks. From DLL Side-Loading to DLL Search Order Hijacking there are lots of known options in Windows. Even though there are no DLLs in macOS, there are still options to interfere with the normal execution flow. For this section we will focus on Dylib Hijacking.
Dylib Hijacking — T1574.004
To understand this technique you need to understand how macOS applications use libraries. A library in macOS contains functionality that applications can load. There are lots of libraries installed by default on macOS, you can see which ones by checking the following locations:
- ~/lib
- /usr/local/lib
- /usr/lib
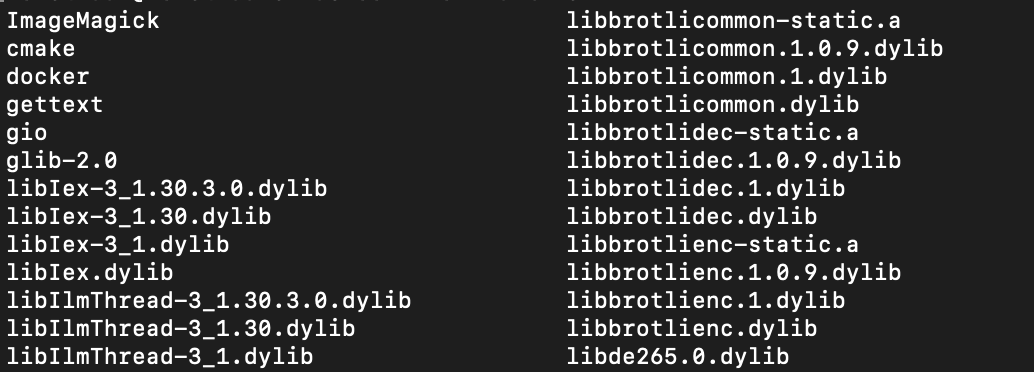
You can recognize them by their extension .dylib, see below an example from the /usr/local/lib directory:
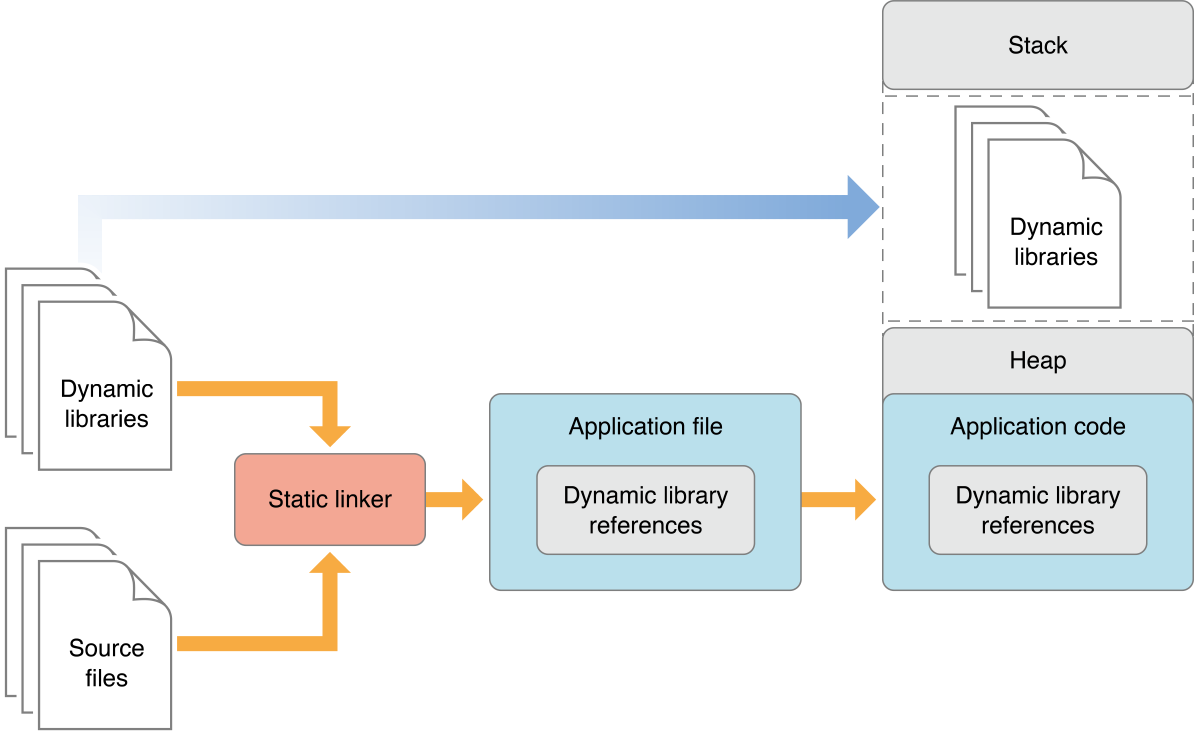
To use a library you can choose to included it in your application package, but the downside is that the application can become pretty big. That’s what we call a static library. However as mentioned you don’t want your application to become huge, that’s why there’s something called dynamic loading. With dynamic loading you load a library when your application needs it, either when the app is launched or as it runs. The figure below from the official documentation shows the usage of dynamic libraries and how that is mapped into memory.
There are multiple vulnerabilities with dynamic libraries very similar to DLL hijacking vulnerabilities in Windows. To get a full overview and detailed explanation you can read this blog by Patrick Wardle. The first method to load a dynamic library is called ‘weak loading’. Meaning that an application tries to find a specified dynamic library and if it doesn’t find it it will continue executing. This presents a great opportunity for attackers as they can scan for applications that use weak loading and if they can find a dynamic library that’s not present but called on by the application they can simply add their own malicious dynamic library to that path. The next question is how does macOS search for dynamic libraries a.k.a. what is the search order. Well that’s documented in the official documentation.

The second method for loading dynamic libraries is using a relative path. This is what that looks like in an application:
@rpath/../Invictus/Library/blog.dylib
What the above relative path will do is look in the directory above itself for a directory called Invictus and follow that path to locate the dynamic library. The vulnerability or danger here is that an application can specify multiple paths to dynamic libraries. The first path is called the primary path, the second path the secondary path etc. Well what if only the secondary path currently contains a legitimate dynamic library? What you can then do is put in a malicious dynamic library in the primary path which is then loaded.
Now that we have the theoretical part done, what can we do as incident responders to investigate these types of attack?
It’s not easy to find traces of this attack if you don’t know what you’re looking for. Applications often require dynamically loaded libraries so to find this behavior you need to know which applications use certain dynamic libraries and what the ‘normal’ path is that they use. The easiest thing to do is create hashes of all your *.dylib files and run it against a virus scanner.
Another option is to manually inspect an application to see what paths are used by that application to load libraries, you can use ‘otool’ for that purpose.
The otool command displays specified parts of object files or libraries.
For example, one of my favourite tools Chainsaw loads the following dynamic libraries including their locations:

Dylib Hijacking, key takeaways for incident responders:
- This type of attack is not preventable as loading of dynamic libraries is core system functionality;
- If you’re suspecting this type of attack, the quickest way is to calculate hashes for all *.dylib files and run them against a reputation database/virus scanner;
- Another option is to manually inspect application packages with otool;
- Last but not least filesystem analysis might help you identify changes in dynamic libraries that are loaded for certain applications.
Event Triggered Execution
Another interesting group of techniques leveraged by threat actors mainly for persistence is using operating system mechanisms to execute malicious code. There are four techniques for macOS that fall within this category, the interesting thing is that most of the techniques are actually more Unix specific than macOS, but for obvious reasons work on macOS. The four techniques we cover are:
- Unix Shell Configuration Modification
- Trap
- LC_LOAD_DYLIB_Addition
- Emond
Unix Shell Configuration Modification— T1546.004
What is the first thing Unix/Linux people with their brand new installation? Exactly modify their shell to make it exactly the way they want it. This meme sums it up pretty well.

On a serious note, the Unix shell is extremely customisable and exists in all shapes and sizes even on macOS. The idea of this specific techniques is that a threat actor modifies the configuration of the shell to automatically run a command or script once a user initiates a session or logs in remotely.
For macOS the default shell is ‘Zsh’, which is short for ‘The Z shell’.
Tip: Before macOS 10.15(Catalina) bash was the default shell on macOS
Zsh configuration files
As with all other Unix shells the configuration for a shell is stored in several configuration files. The type of files that are present and used differ per user type and activity. Below an overview of the files from the Scripting OS X blog.

As you can see there are lots of files that contain configuration details and can be used by threat actors to initiate actions when a session is started. There have been no public reports where this technique was used by threat actors. However, there are some red-teamers that have written about this technique, the first one I’d like to mention is Leo Pit from SpecterOps in this post he explains a method to persistent in the user’s Zsh environment, you can test this method with the PersistentJXA package (GitHub).
Persistent JXA
A poor man’s Powershell for macOS
posts.specterops.io
Another great post that partly leverages Zsh is one by Madhav Bhatt
https://desi-jarvis.medium.com/office365-macos-sandbox-escape-fcce4fa4123c
In this attack, the Zsh environment is modified to execute a payload that drops a login item. We’re not going to rehash the whole blog, so please read it yourself to appreciate all the details.
For incident responder, it’s important to understand how we can respond and investigate this activity. That’s why the table above with configuration files is relevant. When investigate the best thing to do is to investigate the configuration files, because there is no obfuscation or encryption possible. With access to the filesystem or the system itself it’s straightforward open the file and start analyzing it.
Unix Shell Configuration Modification, key takeaways for incident responders:
- Context matters, shells can be executed in a user context or in a system wide context know the difference;
- Know how to locate the configuration files, you can use the table in this blog as a reference;
- Configuration files are executed in a specific order and depend on how a session is initiated e.g. local vs remote logins.
Trap — T1546.005
This technique hasn’t been observed in the wild being used by a threat actor therefore we can’t provide any real examples. If you want to know whether any traps are set, you can do this by executing the following command:
$ bash -c 'trap -l'
If any traps are set you’ll be able to see them. On a system that has no traps set the output should be empty.
LC_LOAD_DYLIB_Addition — T1546.006
This technique is similar to Dylib Hijacking — T1574.004, however in order to understand this technique and the difference some additional background is required. Mach-O is the executable format for macOS, similar to the Portable Executable(PE) format on Windows it uses segments and sections to store code and data. Mach-O also has a header that is interpreted by macOS once the executable is started. With this technique threat actors modify the header of a Mach-O executable to load additional dynamic libraries. There are lots of options available to modify the headers examples are Macholib and HTool.
LC_LOAD_DYLIB_Addition, key takeaways for incident responders:
- To investigate this activity, follow the recommendations from the earlier section on Dylib Hijacking additionally;
- Use a tool like HTool to investigate suspicious binaries.
Emond — T1546.014
A very interesting and also little known technique relies on the Apple Event Monitor Daemon (emond). This utility is located in /sbin/emond, this utility is not well documented by Apple. However, several people have taken a look at it and we want to mention their work as it was very useful for this research. First, magnusviri, has written a blog on what it is and how you can configure it and xorrior has a blog on using emond for persistence. We highly recommend reading both if you like to learn more about emond.
In short emond can be used to perform automated actions such as running a script based on predefined rules. The rules with the associated triggers are stored in /etc/emond.rules/. There are more configuration files mentioning emond on a macOS installation as shown in the figure below:
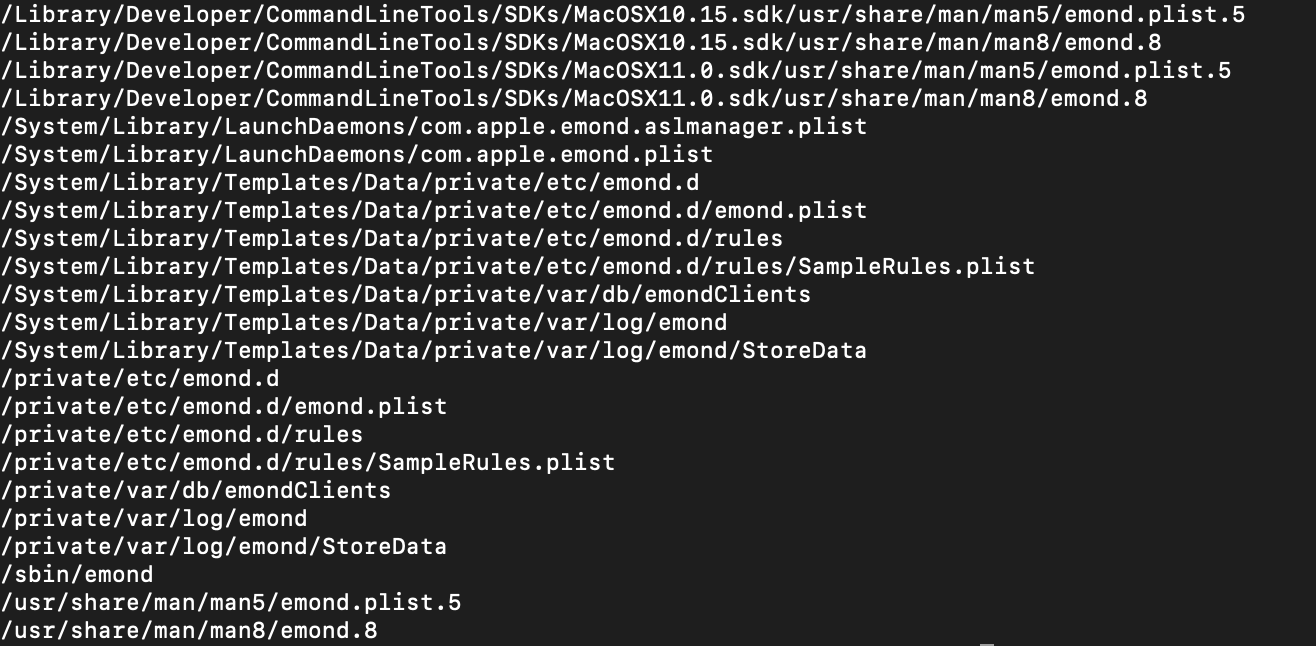
The most interesting files for incident responders are:
/private/var/db/emondClients /private/etc/emon.d/rules
A file needs to be stored in the emondClients location in order to start the emond service. There’s no specific requirements for this file as long as it exists it can even be empty.
The rules directory is more interesting as this contains configuration files in plist format that specify what actions need to be taken. The possible actions are:
- Run commands;
- Send email;
- Send SMS message;
- Send a notification;
- Log something to syslog for example.
In order to investigate what happened on a system and if emond was used consider the following..
Emond, key takeaways for incident responders:
- Existence of a file in the emondClients means that emond was executed;
- Inspect the rules directory to see triggers that caused an action to occur;
-
- If one of the actions was log, you might be able to retrieve information from syslog.
Boot or Logon Initialization scripts
Another technique that is often used by threat actors to achieve persistence is scripts that are automatically executed once a user logs in. It’s similar to a Unix shell script that we’ve discussed earlier, but also a bit different.
Logon Script (Mac) — T1037.002
You can configure a script to execute after macOS is booted and when a user successfully logged in. This is what we call a LoginHook or Logon Script for Mac. Something to consider is that there’s also a LogoutHook, which is exactly the opposite, a script will be executed when a user logs out of the system. Another thing to note is that the script that is configured to run will actually run as root. It still works on latest macOS versions even though the usage of Logon/Logout scripts is discouraged by Apple in their official documentation as shown below:

As an example I’ve created a shell script called ‘Invictus_persistence.sh’ and added it as a Logon Script with the following command:
$ sudo defaults write com.apple.loginwindow LoginHook Invictus_persistence.sh
Similarly to write a Logout script you can use:
$ sudo defaults write com.apple.loginwindow LogoutHook ~/Documents/Invictus_destroy.sh
To read the currently configured scripts you can run the following command:
$ sudo defaults read com.apple.loginwindow
Which shows you the currently configured scripts:

In the above example there’s Login script that will be launched. And also a LogOut script. To identify where the script is located, you need to check the path. For the Logon Script if there’s no prefix for the path it means it’s in the root of the filesystem. To delete existing Logon/Logout scripts you can use:
$ sudo defaults delete com.apple.loginwindow LoginHook$ sudo defaults delete com.apple.loginwindow LogoutHook
This feature is deprecated for Launch Agents this might be the reason we couldn’t find an associated plist for this configuration.
Logon Script, key takeaways for incident responders:
- Sudo privileges are required to configure this activity;
- The Logon/Logout script runs as root;
- Check for existence of this file var/root/Library/Preferences/com.apple.loginwindow.plist, it’s required to use Logon/Logout scripts.
Boot or Logon Autostart Execution
In the previous section we have described a technique that is used by threat actors to automatically run a script after a user logs in. Another option is to run a script when macOS boots. These techniques are discussed in this section.
Kernel Modules and Extensions — T1547.006
If you’re working on macOS or have been working on it you probably heard about kexts AKA Kernel Extensions. Using a kext an application can interact with the macOS kernel, this was often used by endpoint security software to load code and inspect suspicious behavior. For example processes interacting with other processes and for inspection of network traffic. Kexts are also something from the past they are going to be replaced by System Extensions. As of macOS Big Sur (11.0) kexts are not loaded by default anymore. A helpful figure from the Apple Documentation shows the difference between Kernel & System Extensions.
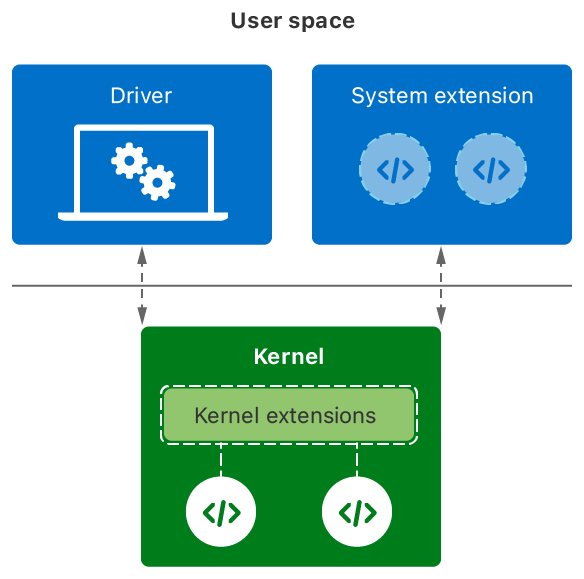
As you can see in the picture, kexts can be dangerous, because they can directly interact with the OS. And since kexts are still available and have been around for a long time we’ll still cover them in this series.
To investigate suspicious kexts you can use 3rd party tools like KextViewr, what it does it collects the loaded kexts and checks the hash against the VirusTotal database. For incident responders it’s alwasy important to understand where this data is coming from, the kexts for the whole macOS system are stored in:
/System/Library/Extensions
Sometimes user applications also store kexts you can find those in:
~/Library/Extensions
To check on an active system what kexts are loaded you can use the Terminal with kmutil.
$kmutil showloaded
The above command shows you all loaded kexts a snippet of the output is shown below:

You can also filter for all non-Apple kexts which should be an interesting starting point for an investigation if you find any, you can do that with some grep magic.
$kmutil showloaded |grep -v com.apple
Kernel Modules and Extensions, key takeaways for incident responders:
- kexts are going to be replaced by System Extensions that are more secure, because no direct kernel level access is required;
- kexts will be around, because not all kernel level functionally has a system extension yet;
- Check the aforementioned directories for the presence of 3rd party extensions, easily recognizable because they don’t start with com.apple
Re-opened Applications — T1547.007
A very interesting technique is the use of automatically reopening applications. If you’ve ever done a reboot or update of macOS you probably recognize this screenshot:
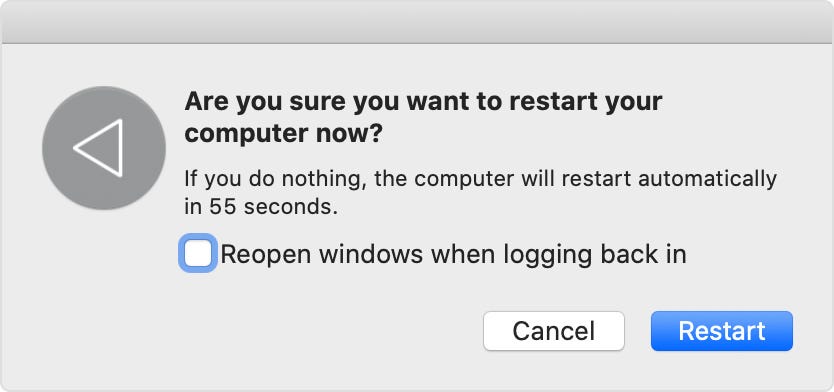
A threat actor can abuse this feature, by modifying the associated plists for this behavior. The plists are stored in the following locations:
~/Library/Preferences/com.apple.loginwindow.plist~/Library/Preferences/ByHost/com.apple.loginwindow.* .plist
To inspect the content of a plist you can either use a text editor or Xcode. In the terminal you can also just the defaults application like this:
defaults read com.apple.name_of_file.plist
There haven’t been any reported incidents in the wild using this technique.
Plist Modification — T1547.011
As shown in the previous techniques plists are the main method for configuring an application. Threat actors can modify Info.plists associated with applications to executed additional commands or run the program with different parameters. The Info.plists is normally stored in an Application folder in the Contents directory. An example for the Brave Browser application is shown below:

Opening up the Info.plist file you’ll see lots of variables in an XML schema that you can inspect and/or modify.

If you look at this snippet from the Info.plist belonging to the Brave Browser you can easily modify the name or even the icon of the application that is shown. In the example below I modified the name of the package, which has no real effect, but you can see the possibilities.
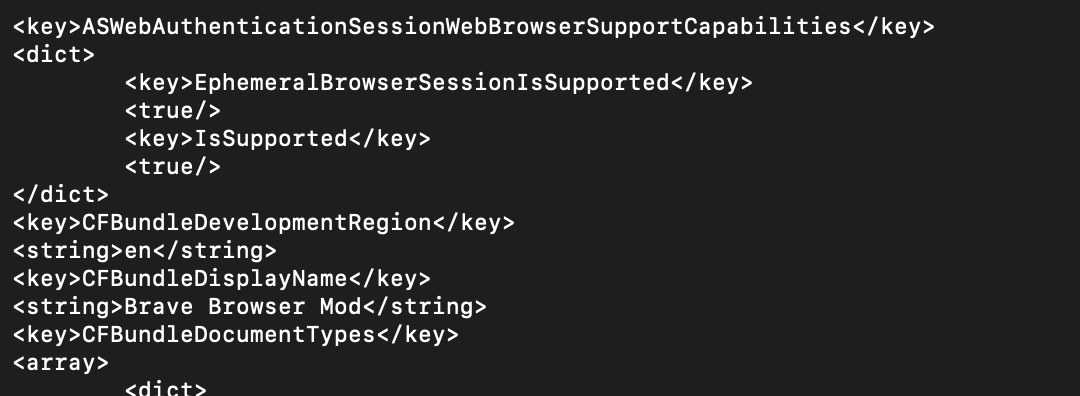
The XCSSET malware used this trick for their operations, Trend Micro wrote a very interesting paper on it, you can read it here.
Plist Modification, key takeaways for incident responders:
- The main plist for an application is called Info.plist and stored in the Contents subfolder of an application;
- Plists contain configuration details for applications;
- If you suspect plist modification compare the original Info.plist that’s distributed with the package with the suspicious one;
- Most plists can be inspected with text editors, if there’s binary information in plists you can use Xcode on macOS.
Login Items — T1547.015
So far we’ve seen several techniques that are used by threat actors gain persistence on a system when a user has logged in.
- Unix Shell Configuration Modification — T1546.004
- Logon Script (Mac) — T1037.002
- Re-opened Applications — T1547.007
This technique is how ‘legitimate’ applications will register themselves to open once the user logs in. It’s similar to the startup folder in Windows, where an application is registered. And similar to Windows threat actors abuse this feature to automatically load their application. First and foremost we need to identify what applications are opened automatically, this information is stored in the location:
~/Library/Application Support/com.apple.backgroundtaskmanagementagent/backgrounditems.btm
Unfortunately, this is not a normal readable plist, it’s a sort of plist with binary data and base64 encoded data. Luckily there’s an open-source parser called bgiparser, written by Minoru Kobayashi.
Once you have the application installed you can run the tool and output the results to the console.
python3 bgiparser.py -f ~/Library/Application\ Support/com.apple.backgroundtaskmanagementagent/backgrounditems.btm -c
An example output is shown below:
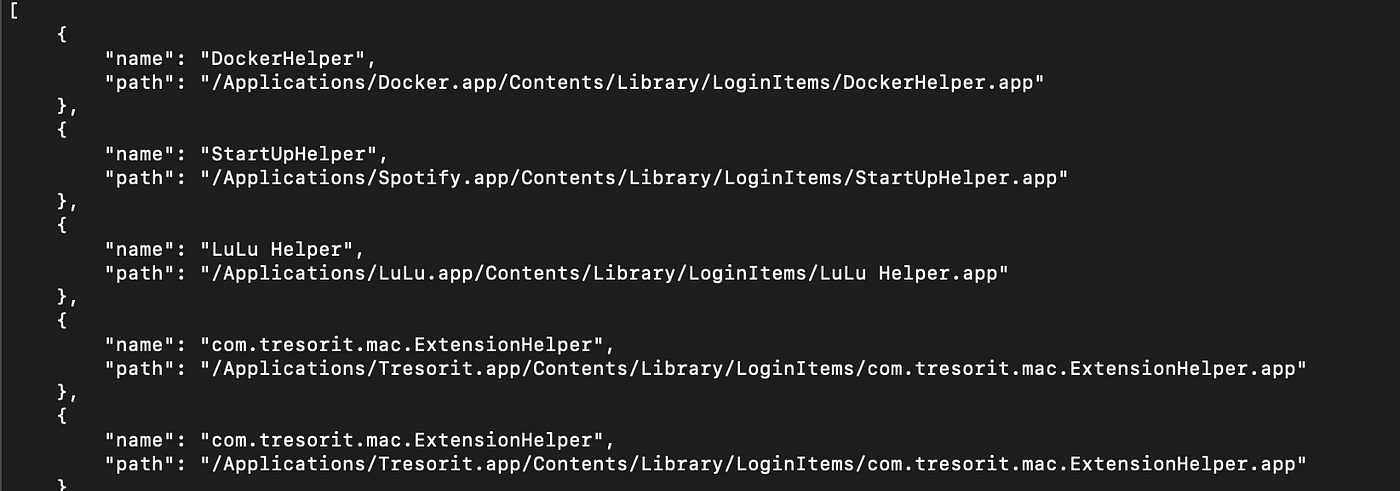
As you can see there’s a duplicate entry in there. The nice thing is that you can just copy the btm file from a suspicious system and run this in your own analysis environment.
Login Items, key takeaways for incident responders:
- Using the GUI you will not see all Login Items present on a system;
- Always acquire/analyse the backgrounditems.btm file.
Account Manipulation
Moving on the next set of techniques, most of the techniques in this scope relate to cloud techniques. However, there’s one classic attack that will be described below.
SSH Authorized Keys — T1098.004
One of the most timeless protocols that has been in use since 1995 for (remote) authentication is SSH. One of the features of SSH is something called an authorized_keys file. This file contains the public key of users that are authorized to login on a certain system. Once the public key of a user is in that file it can login without a password, making it a very interesting file for a threat actor. For persistence a threat actor can simply generate a key pair and add that public key to the authorized_keys file. From an incident response perspective you can also inspect the file and determine whether additional keys were added. There have been several malware families for macOS that used this feature including XCSSET and Bundlore.
SSH Authorized Keys, key takeaways for incident responders:
- For each user directory there’s a unique SSH directory, which can contain an authorized_key file;
- File system analysis can be used to identify the last modification time of an authorized_keys file, which might be useful to identify time period of interest;
- Removing an entry from the authorized_keys file removes the ability to login with that key, but it will not terminate current sessions.
Scheduled Task/Job
A scheduled task can be used in multiple phases of the attack, in the previous blog, we already covered this technique as it’s also used in the Execution and Privilege Escalation phase.
Conclusion
This was the second part of our series on macOS incident response series, we covered 14 unique techniques that can be used for Persistence. By now you’ll have seen that there’s also quite a few legacy techniques that are possible, partly because macOS is based on Unix and partly because some features still work. Due to the amount of information we covered in this article, here’s a short overview of the techniques and where you might find evidence of malicious activity related to that technique.
